|
<< Click to Display Table of Contents >> Main Window |
  
|
|
<< Click to Display Table of Contents >> Main Window |
|
Each control in CD Ripper's main window is described below. For an overview of how to use it, see Introducing Matt's CD Ripper.

The artist name is usually used as the directory name, and the album names is used as the subdirectory name which contains the ripped tracks. But you can change the format from the Options page if you are using MuRip without Music Manager (MuMan). If you change the format, it will not be compatible with Music Manager.
If it's a various artists CD, do not put the artist name here, instead use something like "Various Artists" or "Soundtracks", and check the "Various Artists file name format" option, see below. For various artists CDs, you put the artist name in the Track Name field "track_name / track_artist_name" because each track can have a different artist, see below.
This is usually used as the subdirectory name.
Tip: You can use any characters in the Artist and Album names, even characters which are not supported by Windows in directory and file names.
Select one of the standard MP3 genres. Note that the online CD database does not always supply a suitable genre, and MuMan uses a rational subset of the genres - the genre you choose here will be converted to a MuMan genre if you add the CD to the MuMan database.
The year the music was [first] released. You may prefer to use the original release date of the original album, instead of the release date of the CD. Note that the first ever CD was released on 17th August 1982, and vinyl records (LPs and singles) were produced from about 1950 onwards. But since "music" has theoretically been around for the last 100,000 years, you can enter anything in here, e.g. "10000BC" may be suitable for someone grunting rhythmically while hitting a log with a couple of thigh bones (we seem to be hearing a lot of "music" like that these days).
The root directory to where your files will be ripped. If using Music Manager, this should be your music files directory. Subdirectories may be created, depending on the File Path Formats you have defined in the Options.
Choose or create a destination folder for the ripped tracks.
Opens the Windows File Explorer at the 'Destination Folder' so you can view the sub-folders and files. Albums usually reside in subdirectories of the 'Destination Folder'.
The output file format, see audio file formats.
Various Artists file name format checkbox
Tick this box if the CD contains tracks by multiple artists. For various artists CDs, the 'Artist Name' entry field should usually be a directory name like "Various Artists" or "Soundtracks". Each track may have a different artist, which you must put in the track name using the format "track_name / track_artist_name", with a single space each side of the forward-slash character " / " space-slash-space. For example "Twist and Shout / The Beatles".
The 'Various Artists' file name format is defined on the Options - 'File Path Formats' page. Normally you will use a special 'Various Artists' directory for these albums. The FreeDB database uses the artist name "Various", but you can define any directory name for the File Path Format. If used with Matt's Music Manager, the file name formats are fixed, so a various artists CD containing "Twist and Shout / The Beatles" will always create a file name like "<destination_folder>\Various Artists\<album_name>\01_Twist and Shout_The Beatles.mp3".
Tick this box if you want the ripped tracks to be added to the open Music Manager database. This is usually checked by default if you have opened MuRip from Music Manager. It is disabled and un-checked if Music Manger is not open, or if the Destination Directory is not Music Manager's music files directory.
This is needed if you use the unnecessary Barcode Search feature. Note that it's usually quicker just to press the FreeDB or MusicBrainz search buttons, a barcode search is rarely needed. MuRip saves it in the cdinfo.txt file, and it is put into a TXXX tag in MP3 files.
Opens the Barcode Reader window, which uses your computer's camera to read the barcode on the CD's case, before doing a Barcode Search.
The catalog number is usually found on the spine of the CD, or near the CD barcode on the back. It is assigned by the record label, and usually consists of letters and a number, e.g. "ECLEC 42681". Enter the catalog number exactly as it is shown, with spaces etc. in the correct places. The catalog number is used for the 'Tools > Discogs Catalog Number Search' feature. MuRip saves it in the cdinfo.txt file, and it is put into a TXXX tag in MP3 files.
Believe it or not, this feature is able to play tracks on the CD. See CD Player for details.
This section lets you select the album art image from Internet, and define what you want to do with it. MP3 and FLAC files can contain the album art image. WAV files cannot contain the image, but you can copy the image into the album directory (creates file AlbumArt.jpg). See Selecting the Album Art.
Drag-and-drop or copy/paste the album art image here. See Selecting the Album Art.
Once you have filled in the correct Artist and Album names, press this button to open your browser and search for the CD cover. Choose the image you want, and drag-and-drop the image onto the Album Art window. Occasionally drag-and-drop won't work on some websites because you need to log in for access - but you can simply use 'Copy/Paste' instead (right-click on the image and select 'Copy' from the context menu, then right-click in the Album Art window and select 'Paste').
Check this if you are creating MP3 or FLAC files, and you want the image to be inserted into the file so it will be seen in music players when you play the file. The image file should not be too large, e.g. less than 250KB.
Note: Images cannot be embedded in WAV files, instead you should check 'Copy image to folder' if you are creating WAV files.
Copies the image into the destination directory and names it 'AlbumArt.jpg'. This file is displayed by Matt's Music Manager and other intelligent music players when a track from this directory is selected. Note that MP3 and FLAC files can contain embedded images, see 'Put image in files'.
See Tracks View.
The 32-bit disc ID used by the FreeDB Search feature to find the CD information. Each CD is assigned an ID which is computed from the CD's 'table of contents' (TOC). There may be more than one CD with the same ID, but you can choose the right one from the search window.
The disc ID used by the MusicBrainz Search feature to find the CD information. This is a bit more sophisticated than the original FreeDB disc ID. If you really want to know how it's calculated, see MusicBrainz Disc ID.
This lets you know what's happening and what to do.
Press this if you have no idea what you are doing.
See Options.
After ripping a CD, this opens the Waveform view for the selected track so you can see the audio with any errors marked. The audio can be played from here to see if the errors are noticeable.
Opens the FreeDB Search dialog box where you can choose CD information from the online FreeDB database.
Opens the MusicBrainz Search dialog box where you can choose CD information from the online MusicBrainz database. The quality of track names is slightly better than Freedb, but the Disc IDs are usually wrong. Often you will see the wrong CDs displayed. It seems that certain [small-time] CD producers are creating CDs with IDs that match the CDs of famous artists, just so they can get them displayed.
If you have entered a barcode, this can be used to search the Discogs and/or MusicBrainz database for the CD. See Barcode Search for details. Normally the FreeDB or MusicBrainz searches will find the CD, but you can use this as a last resort, or if you are just fascinated by barcodes. You can also try the new 'Discogs Catalog Number Search' (it's usually quicker to type in the Catalog Number).
The outcome depends on what kind of chair you are sitting on, and how close your priceless crystal wine glass is to the laptop.
Starts or stops the rip process. When ripping, this button becomes 'Stop Rip'.
Closes MuRip. If there's a CD in the drive, and you have entered some CD details, these will be saved and restored the next time the CD is inserted.
Press the Tools button to show a submenu containing lesser-used commands:
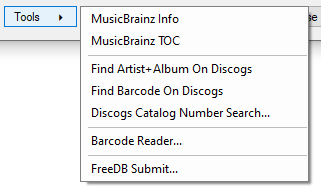
Opens the MusicBrainz website in your browser to display details about the CD. Each CD has a unique 'MusicBrainz ID', which is used to find the CD in the MusicBrainz database. See MusicBrainz Info.
Each CD has a "Table Of Contents" (TOC) which is used by MusicBrainz to uniquely identify the CD and to generate the ID. This shows the technical TOC details, but you may need to put on your Anorak first. See MusicBrainz TOC.
This opens you browser and searches for the Artist and Album on the Discogs website. This will show all releases of the CD, select one to view the details. First you must enter the Artist and Album names in the main window. See Find On Discogs.
This opens you browser and searches for the barcode on the Discogs website. This will show a specific releases of the CD which had this barcode, select one to view the details. First you must enter the 'Barcode' in the main window. See Find On Discogs.
This finds the CDs with the entered Catalog Number, and shows them in the Search window so you can choose one to fill in the data. Discogs is one of the few CD databases that has reliable catalog numbers. First enter the CD's catalog number in the main window, exactly as shown on the CD, with spaces and/or dashes, e.g. "EZK 47363". You can usually find the catalog number on the spine of the CD case, or sometimes it's near the barcode on the back, or on the CD itself.
Opens the Barcode Reader window, which uses your computer's camera to read the barcode on the CD's case, before doing a Barcode Search. This is the same as pressing the barcode reader button to the left of the 'Barcode' entry field on the main window.
If the CD cannot be found in the FreeDB database, then you can add it using this feature. See FreeDB Submit.